What is Sourdough Starter
Sourdough
starter is a colony of micro-organism comprising wild yeasts and lactobacilli.
This natural leaven is cultured from fermenting flour with water
over a period of time. It can be used to replace commercial yeast to make
bread.
Grains contains wild yeasts and lactobacilli, lactic acid bacteria.
After milling, the flour, too contains them. Mixing flour and water
allows the lactic acid bacteria to develop and the acidic environment
allows the wild yeasts to multiple. The lactic acid bacteria metabolise
carbohydrates in flour to form simple sugar. The wild yeast uses that
sugar and also metabolise the carbohydrates in flour and produces bubbles of
carbon dioxide, which helps the dough to rise. The tangy flavour of
sourdough bread comes from the acetic acid produced by the lactobacilli during
the fermentation process.
Benefits of Sourdough Bread
Some people experience stomach discomfort such as bloated or indigestion, after ingesting bread. They could be suffering from certain degree of gluten intolerance. The good news is that some of them can tolerate sourdough bread. How is that possible? Well, sourdough bread is different from the commercial bread. It goes through a long and slow fermentation in which the lactobacillus, the lactic acid bacteria, present in the sourdough starter, breaks down the carbohydrates and gluten in the bread, making sourdough bread more digestible.
Sourdough bread is also more nutritious as the fermentation process also breaks down phytates and releases the nutrients making minerals more bioavailable to our body. Phytic acid, an anti-nutrient substance is present in grains, is also present when grains are milled as flour. This substance binds with minerals e.g. iron, zinc, in our digestive tracts, inhibiting such mineral been absorbed by our body. When phytic acid binds with a mineral in the grain, it is known as phytate. Those binded minerals will not be absorbed by our body but are excreted as waste matters instead.
Sourdough bread is also diabetics' best choice bread if they want to eat carbohydrates as the bread has lower glycemic index.
Sourdough bread also has a naturally longer shelf life as the acetic acid produced during fermentation, inhibits the growth of mould, without any artificial preservatives.
How to make Sourdough Starter
In Singapore climate, it takes about 5 days to cultivate a sourdough starter from scratch with 2 daily feedings, 12hours apart. I've use equal parts of flour and water by weight. For the first 4 days I fed the starter with atta flour, an Indian finely milled wheat flour. On end day 4 onwards, I fed it with bread flour instead of atta flour.
It is important to vigorously stir the flour and water in order to incorporate all the dry bits of flour with water.
The following is my 5 days feeding journal:
Day 1 - 30/7/2017
8am
In a glass bottle, combine 10g atta flour + 10g filtered water and stir well.
Cover the bottle with a cloth, secured by rubber band.
8pm
Pour 20g filtered water into a glass bottle, stir well to combine.
Add 20g atta flour, stir well to combine.
Cover the bottle with a cloth, secured by rubber band.
Day 2 - 31/7/2017
 |
| Presence of air pockets indicates that fermentation activities has kicked in |
8am: Observation - dough has doubled in height
Pour 60g filtered
water into the glass bottle, stir well to combine.
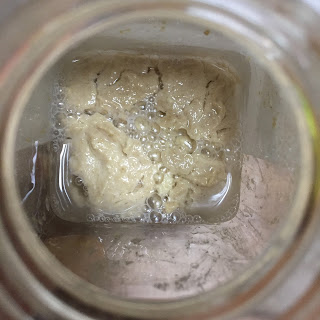 |
| Lots of bubbles surfaced when water is poured into bottle |
Add 60g atta flour, stir well to combine.
Cover the bottle with a cloth, secured by rubber band.
8pm: Observation - dough has doubled in height
Discard most of the dough, leaving 20g behind.
Pour 20g filtered water into the glass bottle, stir well to combine.
Add 20g atta flour, stir well to combine.
Cover the bottle with a cloth, secured by rubber band.
8am: Observation - dough has doubled in height
Pour 60g filtered water into the glass bottle, stir well to combine.
Add 60g atta flour, stir well to combine.
8pm: Observation - dough has tripled in height
Discard most of the dough, leaving 20g behind.
Pour 20g filtered water into the glass bottle, stir well to combine.
Add 20g atta flour, stir well to combine.
Cover the bottle with a cloth, secured by rubber band.
8am: Observation - dough has at least doubled in height
Discard most of the dough, leaving 20g behind.
Pour 20g filtered water into the glass bottle, stir well to combine.
Add 20g atta flour, stir well to combine.
Cover the bottle with a cloth, secured by rubber band.
8pm: Observation - dough has at least doubled in height
Discard most of the dough, leaving 20g behind.
Pour 20g filtered water into the glass bottle, stir well to combine.
Add 20g bread flour, stir well to combine.
Cover the bottle with a cloth, secured by rubber band.
8am: Observation - dough has at least doubled in height
Discard most of the dough, leaving 20g behind.
Pour 20g filtered water into the glass bottle, stir well to combine.
Add 20g bread flour, stir well to combine.
Cover the bottle with a cloth, secured by rubber band.
Observation: the dough tripled within 3.5-4.5hrs.
2pm: Observation - dough already peaked and collapsed a little
Discard most of the dough, leaving 20g behind.
Pour 20g filtered water into the glass bottle, stir well to combine.
Add 20g bread flour, stir well to combine.
Cover the bottle with a cloth, secured by rubber band.
8pm: Observation - dough tripled in height
** I did a float test on the sourdough starter - drop a dollop of the starter into a small cup of water. The starter floats on water, indicates that this sourdough starter is ready to be used to bake bread.
The sourdough
starter is ready when it can consistently doubled or tripled in height within 3hours.
The next day, I used this new starter to make a Simple Sourdough Artisan Bread.


